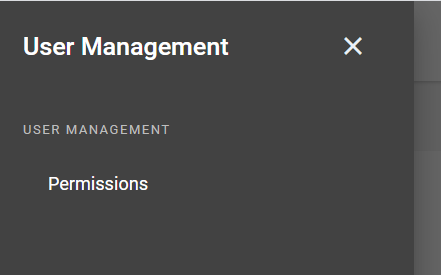
The User Management page is for maintaining the users in your company who will access the M1 web applications (Scheduling Dashboard, Order Snapshot, and Shop Floor Entry). To open the User Management page, on the left side menu, click User Management > Permissions. (show meshow me)

When your company is first set up by ECI to access and use the M1 web applications, all users are copied from M1. Initially, after this one-time copy, the Admin (administrator) users are the only users who can access the M1 web applications. From this point, maintain users for the M1 web applications with the User Management page. On this page, all users are shown in a grid. You can view, add, and delete users and change user access.
Name: This is the first and last name of the user.
Email: This is the e-mail address for the user. This e-mail address is used when sending any required information to the user regarding sign-in credentials and is the e-mail address used by the user when signing into the M1 web applications.
Active: Select this check box to grant access to the current company for a user. Clear this check box to remove access. When you first select this for a user (making the user active), an e-mail is sent to the user with instructions for setting a password to use when signing into the M1 web applications.
The company the user is accessing is shown in the top right corner of the page beneath the 'My Profile' menu.
User Management: Select this check box to give the user permission to access the User Management page, which gives the user full rights to view, add, update, and delete users within the M1 web applications.
Order Snapshot: Select this check box to give the user permission to access the Order Snapshot web module, which gives the user full rights to edit the Order Notification settings within Order Snapshot.
Scheduling: Select this check box to give the user permission to access the Scheduling web module, which gives the user full rights to view data within Scheduling.
Shop Floor Entry Admin: Select this check box to give the user shop floor entry administrator rights and permission to access the Shop Floor Admin web module. When first turning on the SFE Web Module, all users with User Management rights have SFE Admin rights. If you add or change User Management rights for users, you must also select the Shop Floor Entry Administrator check box to grant access for those users.
SFE App Sign-In: Select this check box to allow the user to sign-in and open the SFE app so that Shop Employees are then able to clock in and clock out.
By default, all users with Shop Floor Entry Admin rights have this check box selected also. To clear this check box, you may need to clear the Shop Floor Entry Admin check box.
Note: If you have multiple companies, a user will exist across all companies; however, you must access each company individually to activate and establish the rights for each user within that company.
Click the three dotsthree dots to the right of the user row to display the following additional user menu options:

Resend Verification Email: Choose this option to resend a verification e-mail to the user to allow the user to establish sign-in credentials.
Delete User: Choose this option to remove the user from all company data sets and remove that user's sign-in credentials from within the M1 web applications.
Note: Users with user management permissions cannot change their own permissions, which means they cannot select or clear check boxes to grant or revoke access for themselves.
Add User: Click the Add User button to create a new user within the M1 web application. This opens the Add User window.
Add User window
First Name / Last Name: Type the user’s name to be displayed in the Name column of the grid.
Email: Type the user’s e-mail address. This e-mail address is used when sending any required information to the user regarding sign-in credentials and is the e-mail address used by the user when signing into the M1 web applications.
After entering the required information, click the Add User button to finish adding the user to the M1 web application, or click Cancel to cancel the entry.
Upon adding, the user is added to all company data sets and appears in the User Management grid view as inactive with no permissions. Use the grid view to set the user as Active and to select the permissions for the user.